Every integration guide on this blog starts from the same place: you have a Notakey server, a service on it, and a phone enrolled in that service. The guides then spend their time on the VPN, the router or the web app. If you are not at that starting line yet, they hand you the Notakey side in a sentence or two and leave you to work out the rest.
This guide is the part they skip. It ends with a test request on your phone and the two values every integration asks for: the server hostname and the service ID.
Everything below was done on a fresh cloud instance, in this order.
Step 1: Create the cloud instance
Go to signup.notakey.com and choose Hosted Cloud Instance. The form asks for your name, email and country, and for an Instance name. The cloud domain is added to that name for you, and together they become your hostname:
yourcompany.notakey.cloud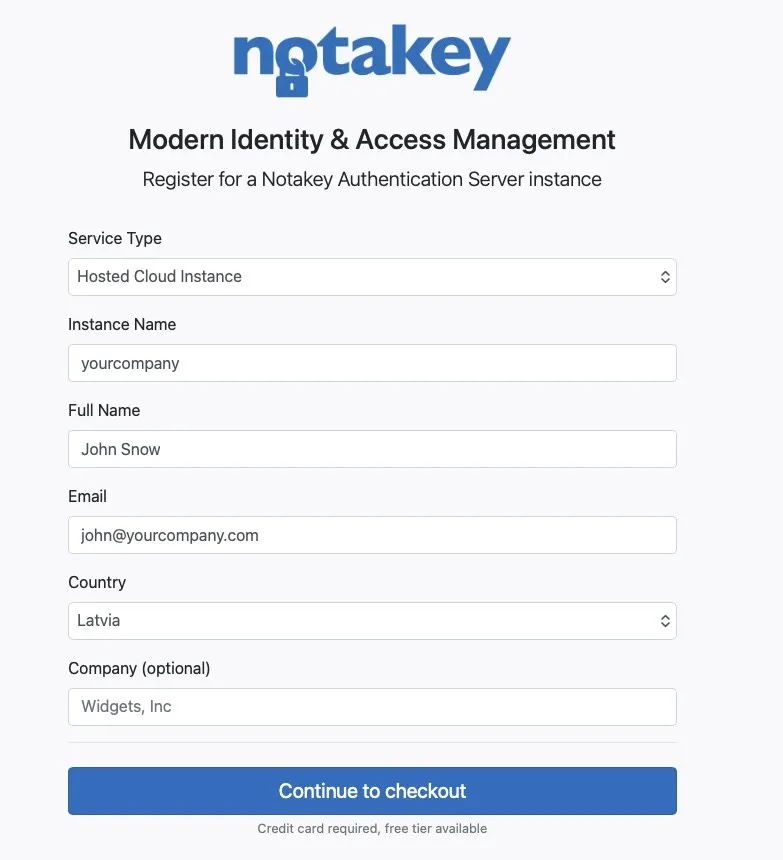
Note the domain: notakey.cloud, not notakey.com. This hostname is the
first of the two values you will need later. Scripts and plugins usually want
it bare, without https:// in front. The phone app needs it with https://
in front, as you will see in step 5.
Continue to checkout takes you to a Stripe checkout page, where you enter a card or use Apple Pay. There is no seat count to choose. The signup page notes that a credit card is required and that a free tier is available, and the checkout itself shows nothing due on the day.
After that a provisioning screen runs for about a minute, and then your new instance opens with a four-step setup wizard: Welcome, Create user, Onboard user, Setup complete.
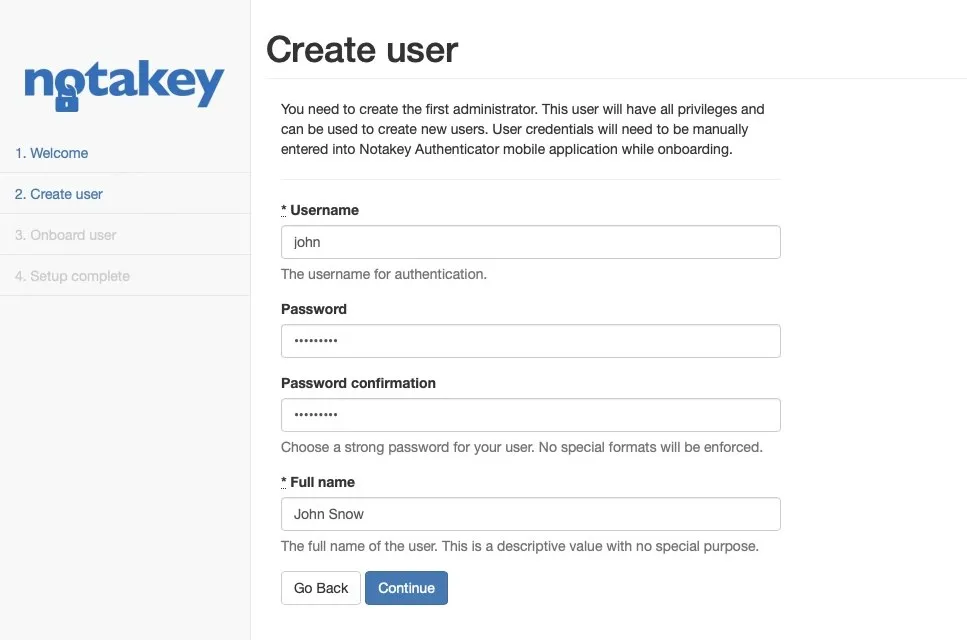
In Create user you create the first administrator: a username, a password you choose, and a full name.
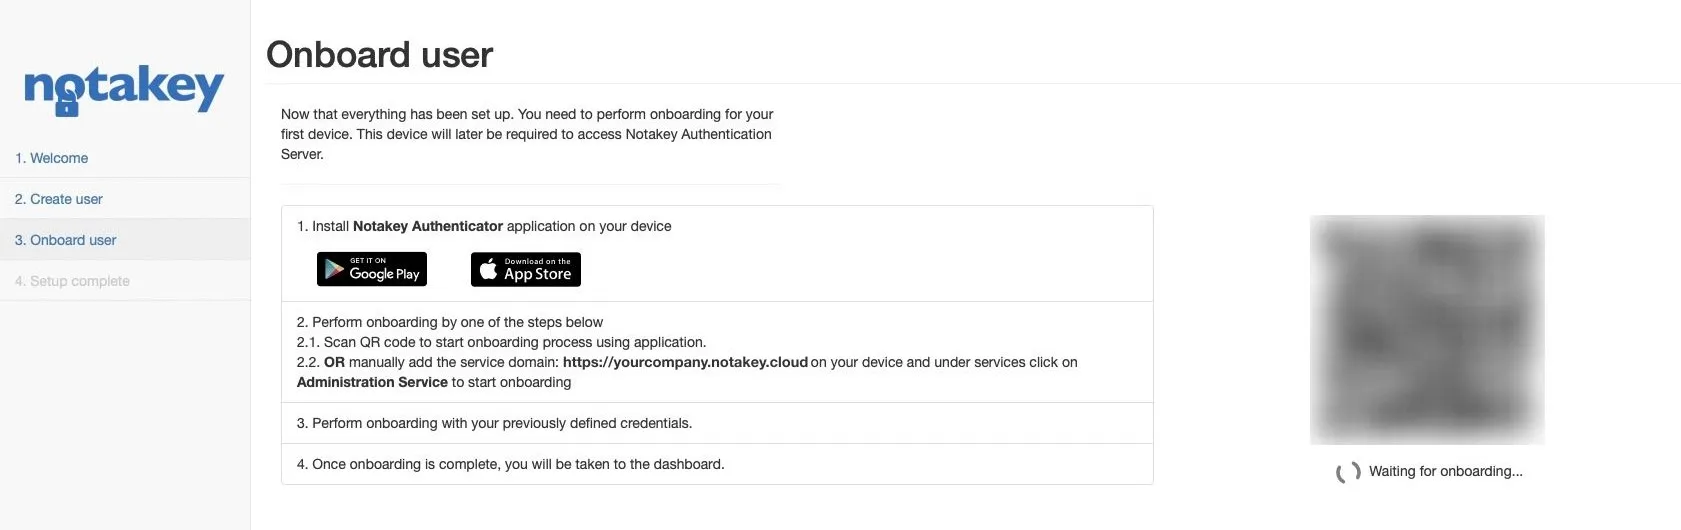
Onboard user then enrols your own phone. Install Notakey Authenticator, scan the QR code on the page, and sign in with the username and password you just created. The page also gives the manual route: add your server address as a service domain in the app and pick the Administration Service.
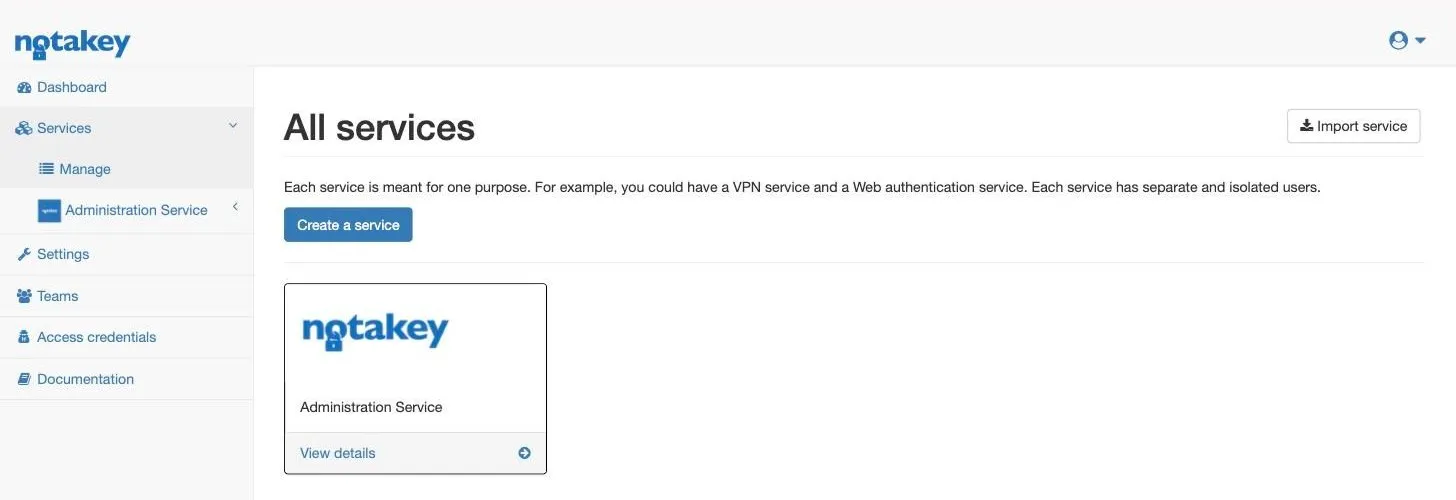
When the phone is enrolled the wizard finishes and takes you to the dashboard. Your phone is now part of the instance’s built-in Administration Service. That matters in step 5, because it means your phone already has your domain.
Step 2: Create a service
A service is one thing you protect. A VPN is a service, a web login is another, and each has its own separate users. In the dashboard open Services → Manage and press Create a service.
Only Name is required. Pick it with care, because this is what people see on their phone every time they are asked to approve. “Office VPN” tells them what they are approving. “Test 2” does not.
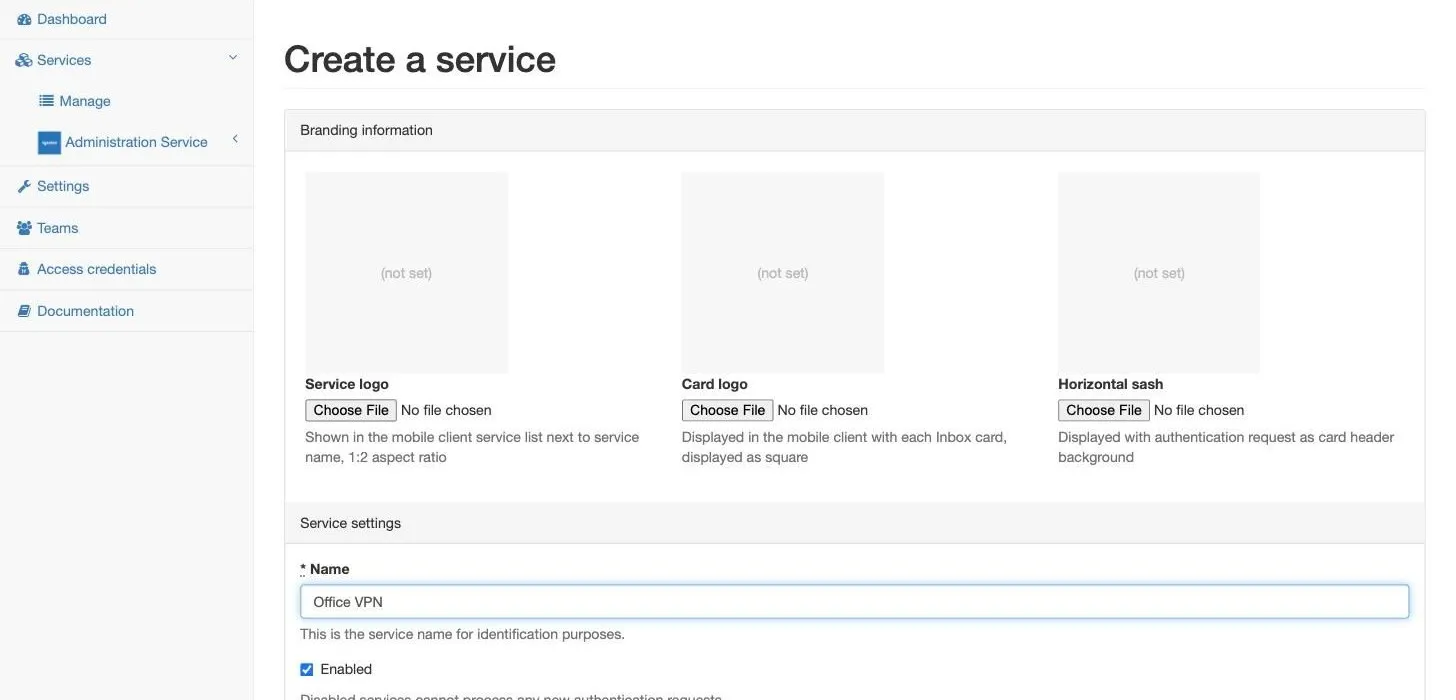
The defaults further down the form are sensible for a first service, and we
left all of them alone: the security level is Hardware protected, each
user may enrol one device, and simplified usernames are allowed, so a user
is john rather than john@domain.
Press Create. The service page that opens shows the second value you will need, labelled Service ID (Access ID):
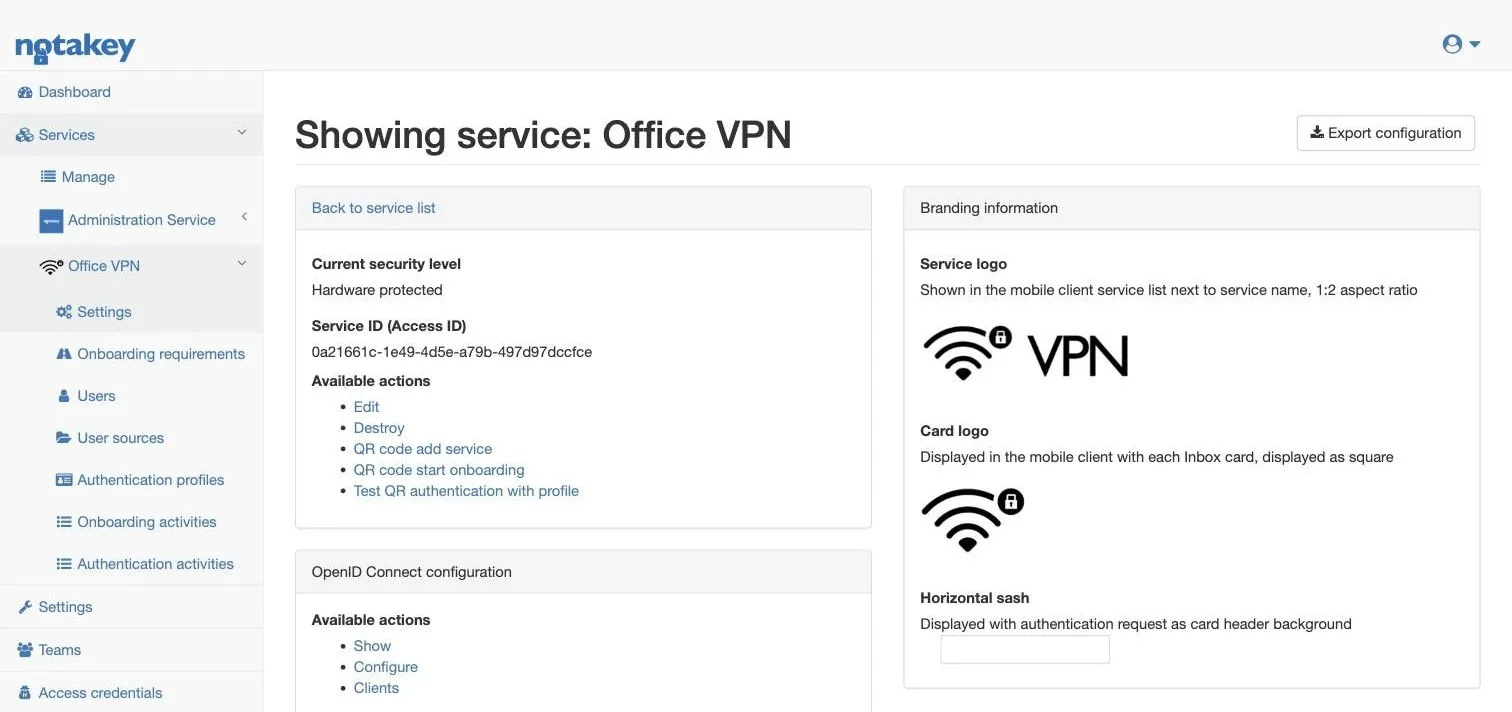
Integrations call this value different things. The MikroTik script calls it
ntkAccessId; plugins tend to say Access ID or application ID. It is always
this one UUID, and it identifies the service, not your account. A second
service gets a different one.
Step 3: Enable an onboarding requirement
This is the step people miss, and the symptom is confusing: the service exists, the dashboard shows no error, and the phone cannot find it.
A new service has no way for anyone to enrol. Open Onboarding requirements in the service’s menu and the page says so plainly:
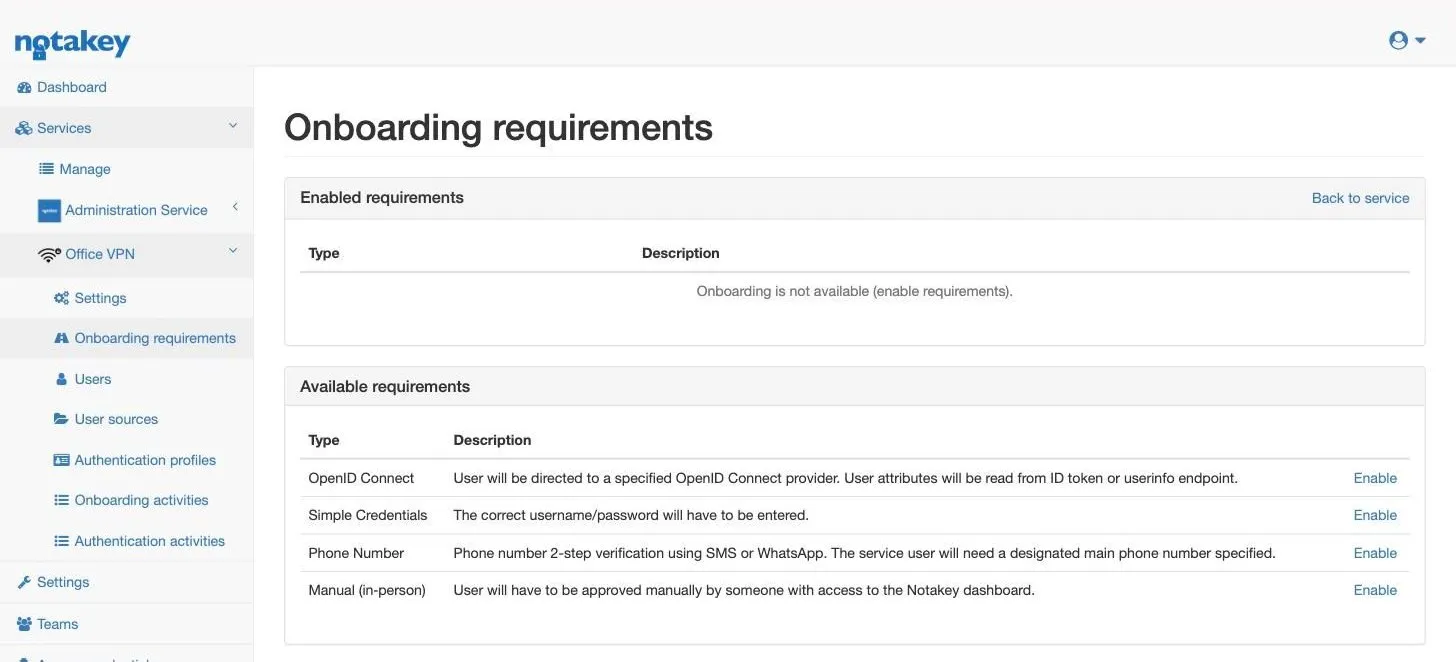
An onboarding requirement is how a person proves who they are at the moment they attach their phone to their user account. There are four:
- Simple Credentials. The user types a username and password that you set in the dashboard. The quickest way to get a small team going.
- Phone Number. A two-step check by SMS or WhatsApp. Each user needs a main phone number on their account.
- OpenID Connect. The user signs in at your existing identity provider, and their attributes are read from there.
- Manual (in-person). Someone with dashboard access approves each enrolment by hand.
For this walkthrough press Enable next to Simple Credentials.
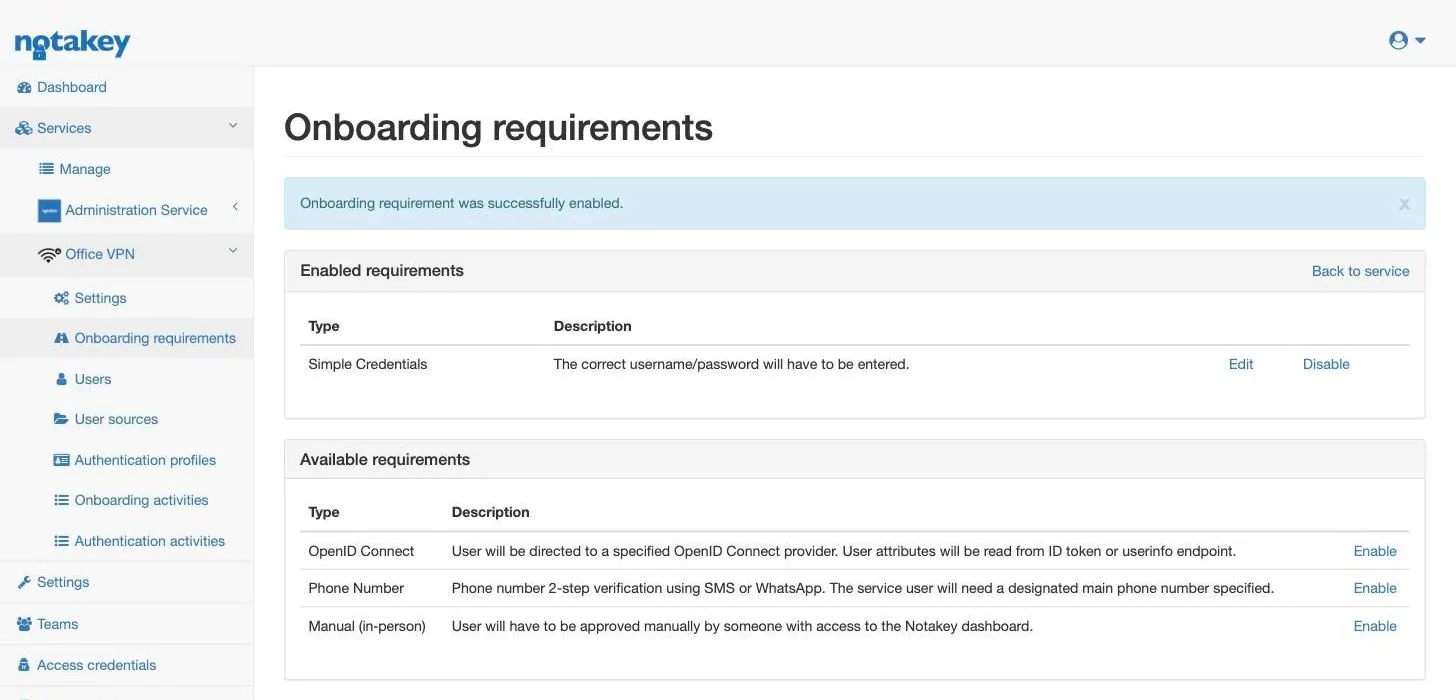
One rule to remember about this page: the phone app lists a service as available only while it has at least one requirement enabled. If you remove the requirements later, people who are already enrolled keep working, but the service vanishes from the list for everyone else and new users cannot join. If a colleague ever reports that the service “is not there”, look here first.
Step 4: Create a user
Open Users in the service’s menu and press Create a new user.
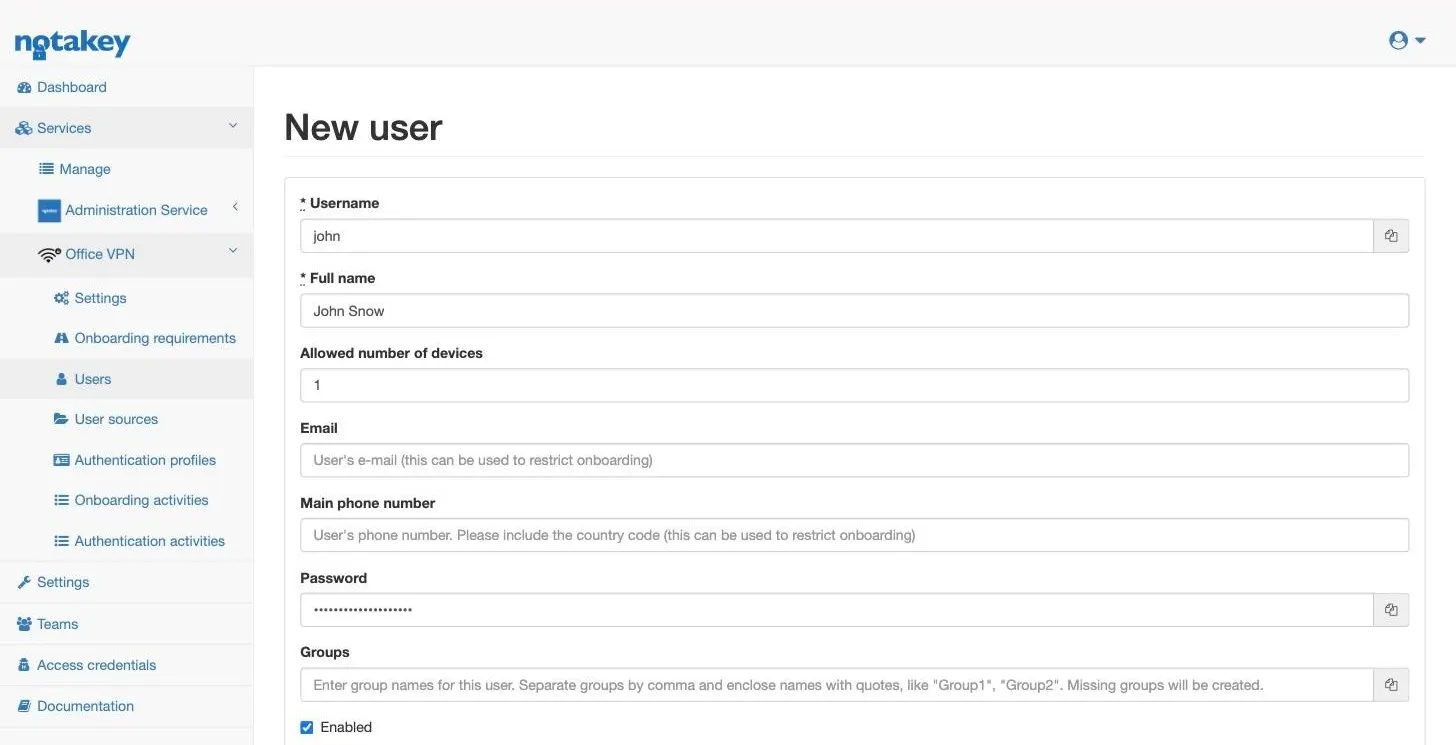
Username and Full name are required. For Simple Credentials you also have to set a Password yourself; nothing is generated for you. This is the password the user types on their phone in the next step, so choose it, note it, and hand it over the way you would any other initial password.
If this service is going to protect a VPN or a server login, the username
here has to match the username on that system character for character. The
integration addresses the approval request by username. john on the router
and john.snow in Notakey will fail silently, with no push and no error
message, and that is the most common reason a first integration test appears
to do nothing.
If your users already live in a directory
Creating users by hand is fine for a handful of people. For a whole company you do not have to create them at all. Each service has a User sources page, next to Users in the menu, where you can connect the directory you already run. Three types are offered: Active Directory, LDAP and RADIUS.
With a user source in place, people enrol themselves. They open the service in the app and sign in with the username and password they already have in the directory, and their Notakey user is created at that moment. The Phone Number requirement works the same way, provided the directory holds the right phone number for each person. You do not create anyone, and there are no initial passwords to hand out.
The rest of this guide stays with the user you created by hand, because it gets you to a first approval with nothing else to configure.
Step 5: Enrol the phone
Install Notakey Authenticator from the App Store or Google Play.
The app finds services by server domain. Under Settings → Service domains it keeps a list of servers, and for each one it reads every service on that server that has onboarding enabled.
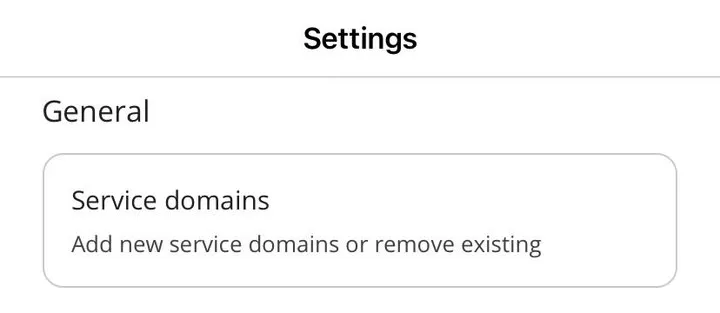
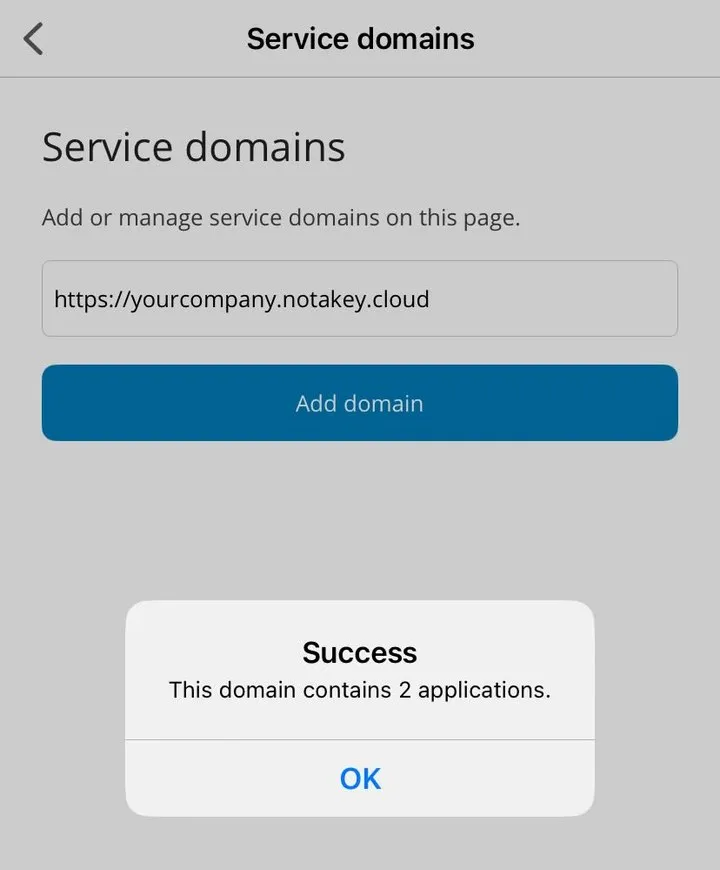
Your own phone already has your domain, from the setup wizard. For everyone else there are two ways to add it:
- type
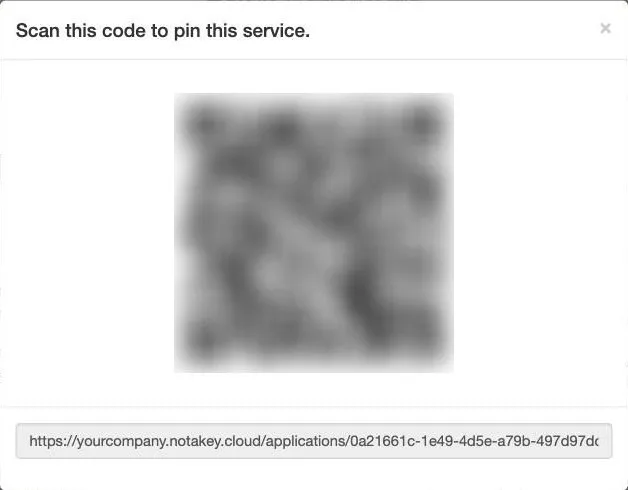
https://yourcompany.notakey.cloudinto Service domains and press Add domain, or - scan the code behind QR code add service on the service page.
Type the address with https:// in front. Without it, a cloud hostname is
not found. The app answers with the number of services it discovered, which
is a useful check in itself: two here, the Administration Service and the
Office VPN service from step 2.
The bare-hostname form is for self-hosted appliances that publish a DNS service record for their domain. That setup is covered in the DNS SRV records note.
With the domain in place, open Services in the app. Office VPN is listed under Available.
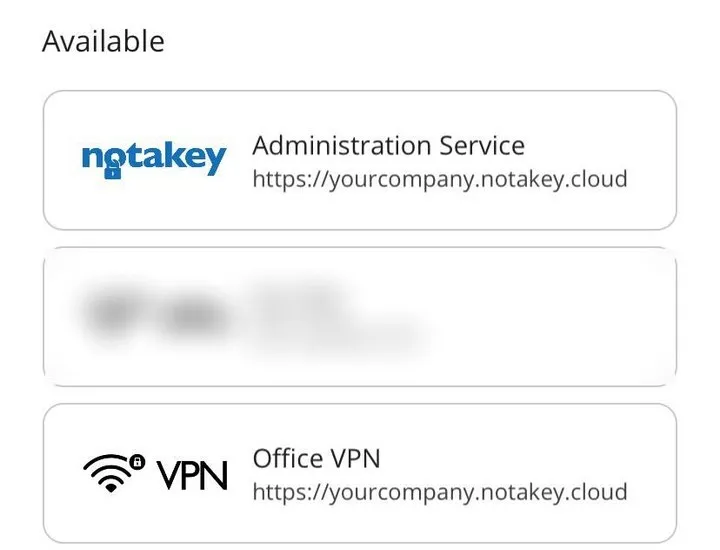
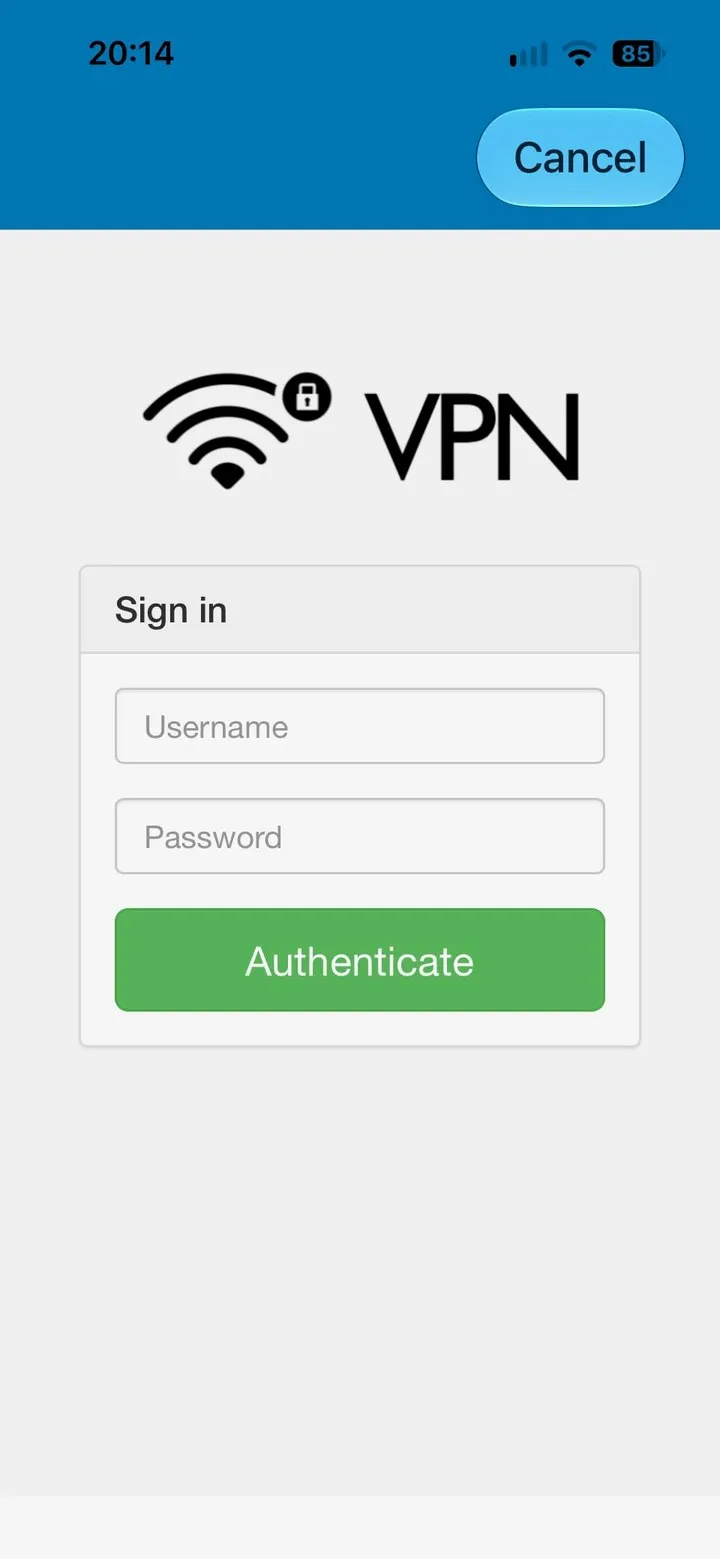
Tap it, and the app asks for the proof you chose in step 3. For Simple Credentials that is the username and the password you set in step 4:
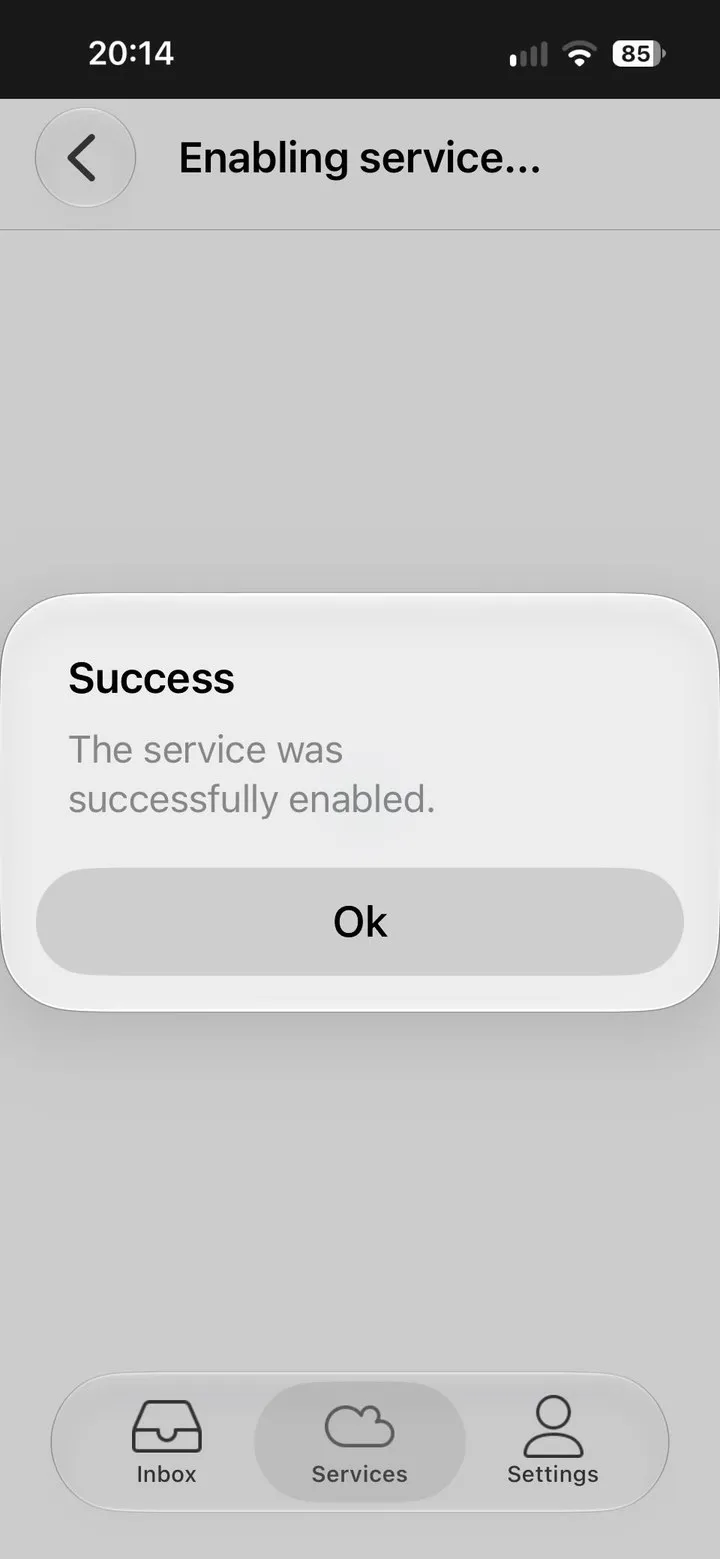
A moment later the app confirms that the service is enabled. The phone now holds a key for this user in this service, and the password has done its job: from here on, approving is a tap.
Step 6: Send a test approval
Do not connect anything yet. First prove that a request can travel from your server to that phone, with no VPN, script or plugin in the way.
In the dashboard open the user you created. The page shows the enrolled device and a Notification test button.
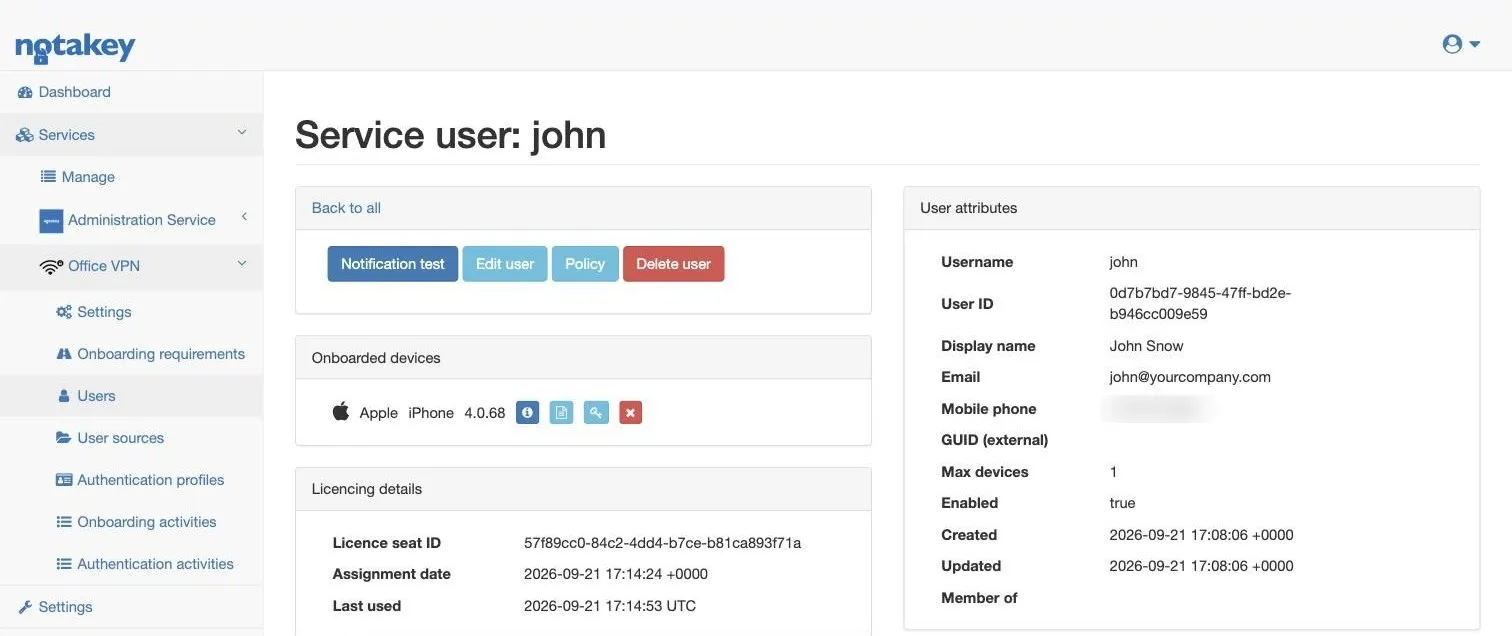
Press it, and the request lands in the app’s Inbox:
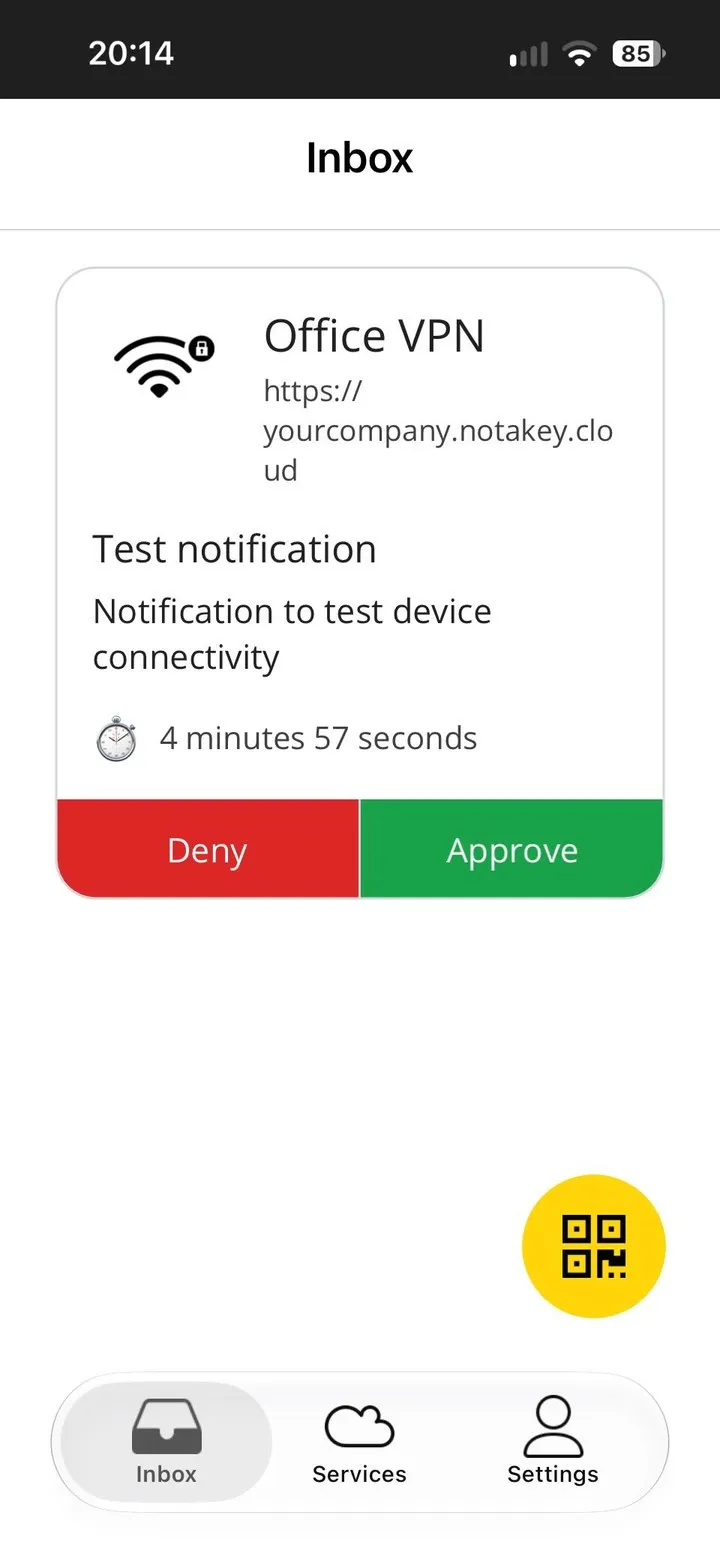
Look at what the card shows: the service name you chose, the server it came from, what is being asked, and how long the request stays valid. That is the same card your users will see for a real login, with the real description in place of the test text. Approve or deny it. Either way, you now know the whole chain works.
If nothing arrives, the problem is between the server and the phone, not in whatever you were planning to integrate, which is exactly why this test comes before the integration. Check that the phone allows notifications for the app, and that the device really is listed on the user’s page.
What you have now
Two values:
| You need | Where it is | In this walkthrough |
|---|---|---|
| Server hostname | the instance name from signup | yourcompany.notakey.cloud |
| Service ID (Access ID) | the service’s page in the dashboard | one UUID per service |
And one working path from server to phone. From here, pick the guide for what you are protecting:
- MikroTik VPN 2FA with RouterOS scripting.
The hostname goes into
ntkHost, the Service ID intontkAccessId. - VPN 2FA with RADIUS for any VPN that can point at a RADIUS server.
- Linux SSH 2FA with pam_radius.
- Windows Credential Provider for Remote Desktop.
When you roll out to the rest of the team, steps 4 and 5 are the only ones that repeat: one user per person, and each person adds the domain and enrols their own phone. With a user source connected, step 4 is no longer needed either, and all that is left for each person is step 5.